Friday, August 29, 2008


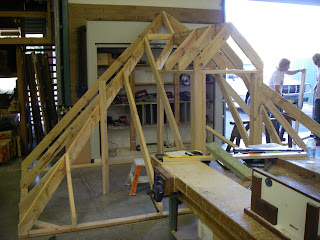
wednesday we carried on finishing the dorma window. paul decided that we would do a truncated hip on one side of it. so we started working out how we would go about it. we decided on a measurement of 900mm each side of the truncated hip and began working out measurements for the jack rafter. once this was achieved we cut it out and worked out where to cut the main hip. then we worked out and cut the hips, nailed it all together and voila!

thursday i was sick so i actually didnt do anything....

friday was a god day, luckily the boys did basically nothing while i was gone so i could finish off doing the hexagon end roof. we were doing mathmatical workings out and measuring in rafters and hips. once the frame was up we had to work out the underpurlin bevels and manifacture them. dan drew up a picture giving us the bevels and then we all measured and cut an underpurlin each. once this was done it was lunch. after lunch we carried on at our own pace doing our assignment... and now im on the computer doing the last blog i will ever have to do:(

my time here has been quite and enjoyable one. i liked the way we only had a small group allowing us to get more hands on experience and being easy for the lecturer to work through it with us. i feel i have learnt alot about things i had no idea about before and i feel more confident in my carpentry skills.
all in all its been a good 20 or something weeks here!
to all my readers, i apologise that it has to come to an end... im sure with time you will overcome this loss in your life and will move on to bigger and better blogs. Robs for instance.
take it easy, catch up with ya!


Tuesday, August 26, 2008

today we carried on doing the dorma window. we started measuring and working out where the stud walls would go and the length of them. then we cut them and put them in place, plating the top to create the wall plate for the little pitched roof ontop of the window. we measured what our window would be and worked it out in courses to the right height. after this we starting cutting out the roof and pitching it. it went together pretty smoothly, our only problem was the ridge being bowed..
we measured and cut the valleys then nailed them in. there were a few minor problems we came ascross but all worked out fine after some thinking.. i enjoyed the day even though im not feeling too good..

Monday, August 25, 2008

on thursday we sat two assessments. one on calcualations of hip, valley and oblique roofs and another on general questions about them. i feel i did pretty good in these assessments, there weren't many questions i wasnt confident about answering. this took up most the day and what ever time we had left at the end we used to start on our portfolio. the portfolio is evaluating a plan, also producing construction sequences as well as all safety plans and stuff like that.

friday we sat our practical test on an oblique end roof with a gable at the other end. we used our drawing bevels to get all the correct down and edge cuts for the hips, rafters and underpurlins. i did really well in it i think and mine ended up to be one of the neatest. so i was happy with my end results in both the written tests and the practical.

today, (monday) we began looking at dorma windows and started to construct a full size hip end so we can install a dorma window in it. im working with renna and so far so good. we have the hip end up and filled in so tomorrow we can go straight into working on the dorma window..
ill get photos and put them on here so all you people reading this can look at them:)

Wednesday, August 20, 2008

today we started building an oblique roof as a group taking up two bench tops. we got the plat out and made our perimeter of the building, then began working out the offsets and half spans. we all got together and worked out what were the correct answers then transfered them to the plate. after this we started working the rafters and hips. rob cut all the common rafters and the rest of us cut the hips and creepers. the roof went together really good and there were no stuff ups at all. we measured and cut underpurlins and fitted them in. all our working out was from previous work sheets we have been given and the brown paper drawings we did on tuesday.
good day

Tuesday, August 19, 2008

monday we were introduced to irregular roofs and oblique roofs. paul gave us some book work to look through and start filling in then we started on our brown paper drawings. we started drawing bevels and true lengths. it was complicated to look at and at the start i had no idea what the hell we were doing. but then wehen i started following the instructions i realised what was going on, it was a way to work out the true lengths of rafters, creepers and hips. we also worked out the rise and the bevel angles to use.

we continued finishing the drawing today (tues) up until lunch time, we then transfered out angles onto a bevel board. after this we went in and did some activities on working out hip lengths, jack lengths, nderpurlin lengths on a few plans using pythagoras and other methods.

Thursday, July 24, 2008

this week at tafe we have been looking at hip and valley roofs. we got straiight into making a hip and valley roof using wall frames as the walls. i had to make up a couple of wall frames to create an L shape in order to produce a valley. after it was all set up we plated it and started measuring half spans and marking out the roof. we worked at 600 centres. the other boys began cutting out the main roof and i cut out all the minor roof.
i jumped up with renno and mike to put up the main roof. it went together quite well and was a big improvement from the last time we cut roof out. the roof went up and we framed out the gable at the end of the house. then we worked out the scotch valley we were going to put in and cut the rafters for that. it all went together pretty good.
ater this we went into the classroom and begun working throught the hip and valley work book. we carried on and did this wednesday too, along with some other work sheets on ordering and working out how to order timber for a plan. on thursday we finished the work book and went to the library to type up our construction sequences.

Friday, May 30, 2008

i just wrote a post but the stupid thing didn't work. pull your finger out blogger im sick of your shit

Wednesday, May 28, 2008

for the last couple of days we have looked at roofing, ceilings and eaves. we constructed the cieling on our timber framed house and then proceeded to work out the roof. i found this quite easy because i have done this before. we all had a go at cutting diffrerent types of rafters. after strapping the hangers on the cieling, me renna and daniel got up to pitch the roof we cut out. we started with a pair of commons and each end then nailed on the jack. dan cut a hip so i cut the creepers to go on it. it was a fun excercise. however, we came across a problem when we nailed the commons onto the ridge. they weren't all the same length making the ridge out of the level (on the piss bigtime!) we will have to sort that out later. it was rainging today so we did a brown paper drawing on 3 different eave types.
boxed eaves
lined on the rake eaves
lined on the top eaves

this was quite enjoyable and i flew through it without any problems. we then started doing bookwork on the introduction to roofing.

Wednesday, May 21, 2008

ok so we are back tafe for another two weeks.. its wednesday and for the last few days we have been looking at hanging doors, fitting skirting, fitting door locks and made door jambs. we all made the door jambs together and fitted them in our little framed house. we had a door opening each and worked alone to get the jambs to the correct size then levelled. i finished first so was the first to start hanging my door. it proved to be a little tricky because it was my first ever attempt. the door came up alright when i hung it, the only problem was when i marked my hinges onto the jamb the door fell down a bit leaving a bigger gap at the top of the door.. i will know for next time:)
after i finished hanging my door i fitted a lock onto a fake door (piece of wood) and that all fitted fine. i then went on to do the skirting, i enjoyed doing the skirting and it came up well i think. i am now starting to hang the double doors.... so i'll let ya know how it all goes. catchya

Friday, April 11, 2008

WEDNESDAY, THURSDAY AND FRIDAY.

over the last few days we have carried on with the concrete slab activities. we completed the set out of the slab and dug the trenches for our footings. we the made up the shutters using outriggers, braces, pegs and ply wood for the shutters. it was a little difficult setiing them up mainly because our pegs were not strong enough. we used old stakes when we should have made new ones up out of 90x35... after it was all in place and paul gave it the ok, we denailed and dissassembled it recycling the timber we used. we did a series of paper work and sections on concreting. we researched concrete and form ply, filled out costing sheets and order forms for the shutters and concrete. we also sat assessments on cladding, cladding calculations and wall frames.

Tuesday, April 8, 2008

TUESDAY

when i arrived today i was informed that our next project is preparing a concrete slab. so we talked a little bit about it in the withdrawal room then headed out to the site.
when we arrived there i noticed the fellas had got a boundary line and a couple of hurdles in on the previous day. we continiued on working out the boundary lines of an australind plan. after we got the hurdles in and levelled them off the datum point which was 1340. we then checked for aquare using the 3,4,5 technique and measuring our parrellels and diagonals.. after it was squared (which was a bit of a muck around) we started marking where internal walls were going to be and put hurles in there and transfering string lines to show the walls. paul then talked to us about the thickness of the bricks and told us to think about it so we can transfer the boundary marks into the outside of the internal wall. it was 160mm from our boundary.
we then went into the withdrawal room again and discussed all about making up the shutters for the concrete. we worked out what materials we needed and there sizes so we cut all them out and lugged them over to the site so that first thing tomorrow morning we are straight into it flat out nailing them together... stay tuned


MONDAY

wasn't here due to i didn't feel well...

Thursday, February 21, 2008

FRIDAY

today we did a section on explosive power tools. we looked at the different types and fastenings and then went out to use the ramset nail explosive nail gun. we shot through timber into concrete and through metal into steel. the experience was pretty good and we learnt how to use the tool in a safe way because none of us have ever used an explosive power tool before. after this we filled out a booklet on explosive power tools before sorting out a portfolios and studying our sub floor work because we had yet another assessment. i think i did ok in the assessment but there were a few questions i was unsure about... AND IM OUTA HERE!!!!!


THURSDAY

today we continued cladding our wall frames. me and dan were quite enjoying it, we almost got antoher wall done and went to the sides of the window and was looking really good but we couldn't finish because we had to do an assessment on levelling and set out. i think i did alright in this assessment.

Wednesday, February 20, 2008

WEDNESDAY

today was a full day of practical work where we were going to put what were learnt about cladding to the test.
we made rods that we put marks on showing the cover of each board for weatherboard and cedar. to get these cover measurements we simply took the overall height from the bearer to the top plate (2520) and divided it by the width of the board minus the cover we want (152-25) then we got our answer which was 19.843657. so we rounded up to make it 20. (2520 divided by 20= 126). so that is our measurement.
after we tranfered these measurements went went out to the wall frames and started marking out where the boards were going to go and put on stops at the end of the walls and the top of the beared as a level guide.
i teamed up with dan to start cladding the nib wall. we were using cedar boards and it was all going together nicely until we ran out of boards half way up.. so we discussed with eachother what to do and came up with the idea of nailing a blocking at the top of the boards with a rebate in it so it fits over the top about 25 mm. we then measured and cut out a sheet of hardi-flex to fit into the top half of the nib wall. it went in beautifuly!!! we nailed it off, then sat back and admired for a little while before starting the next wall. we applied installation on the wall with spot fixers and put the stop in at the ends and bottom of wall.


tuesday

today we started out researching all different types of cladding, focusing on timber cladding, sheet cladding and fibre -cement cladding. we looked on the internet as a resource and printed off material safety data sheets, installing manuals and typed up and general report on what the cladding is and made of.
we did this until lunch time when we put all this information in our portfolios and went over to the workshop where we sat in the classroom and worked through a wall framing booklet. we did activities on take off sheets for cladding. it was fairly easy although when it came to do the sheet cladding take off sheet it required alot more thinking.

Sunday, February 17, 2008

MONDAY

today we finished levelling our walls and making them aquare. we checked the string lines and made and adjustments to the walls where needed by nailing diagonal bracing fomr the bottom plate to the opposite wall top plate and measuring the pencil thickness before nailing in place. we also used spirit levels on the outside of wall corners to make sure everything was nice and plumb. after this we did dog leg in the walls that needed it and measured and cut the end noggings before nailing them in place. then we cleaned up the site puting away all tolls used and cleaning away off cut timber and what not.
we went to the library after lunch to discuss our construction sequence for making wall frames and erecting them. rob wrote up a draft as we all contributed our ideas then i typed up a good copy on the computer and printed them off.
after this i looked at my blog and pretty much typed up what you just read....
FRIDAY

today we were straight back into our construction of our wall frames. we finished off the last one and braced it up so they were ready to be lifted up and fitted in place. we still worked in our team of 3 so our team started at one end of the house and team 2 started at the opposite. our first wall we lifted up was the side wall of bedroom 1. we then lifted the back wall in place and temporarily nailed them together to hold eachother up. once these two were stable we then began lifting each wall in place and bracing them together. after all the walls were up and in place we started to get them level by running a string line around the top plate and making the distanc between the line and the plate a pencil thickness. i went around and trimmed out where load bearing walls were giving the floor extra strength to support the wall frames.dan, greg, rob and i then began measuring and working out where the internal wall frames were so we started making them up. i made the shower nib wall and the bathroom nib wall and fitted them in place while the other boys made the bathroom walls which were all levelled and fixed in place. all this took up the whole day.

Wednesday, February 13, 2008

WEDNESDAY

today we carried on with our drawings on wall framing. we drew 8 drawings in total. three were of different corner junctions where studs would fix onto the bottom plate.
another three were on three different lintal types, showing the different rules of when and where to put a lintal and how to fix it. the 7th drawing was just showing how to make up a wider, stonrger beam out of two pieces of timber.
the last drawing was an isometric drawing of three studs fixed to a plates showing different notches and rebates where bracing would be fixed.

THURSDAY


today we began making up our wall frames. working in teams of three, i was teamed up with rob and mike. our first wall we all worked together on cutting studs and noggings and nailing them together with the nail gun. then we measured the diagonals and made some adjustments to get it square before bracing it with an angles piece of timber.
after this i started working on a wall on my own. i chose to work alone because i enjoy the satisfaction knowing i alone accomplished a framed wall. i worked through the task with few problems except when i was marking it out i hundred mm'd it but i soon fixed that. i did a lintal at the top of the window rabated into the two studs. i then measured the diagonals with paul and amazingly it was already perfect square. i then braced it using metal bracing. good day

Monday, February 11, 2008

MONDAY AND TUESDAY

well its the first day back and WOW what a start.. we began our journey working through our work booklets on wall framing. paul discussed to us all about framing up walls. we also had a squiz through AS1684 talking about specifications. we then did take off sheets on two different plans working out our ordering lists for studs, plates, lintels, trimmers and noggings. we then went out to the workshop and got our drawing boards ready for a brown paper drawing. and we got homework!!!!! what a joke...

TUESDAY

today we went through our homework and marked it, then continued on looking at settign out wall frames and where doors and windows are located. after this we went out to the floor and began marking out where our plates are going to be. me and daniel marked and pinged lines with the chalkie while the other guys cut plates and also marked and measured. after we got our plates we began marking where our studs, doors and windows are going to be. then we began fittig the rest of our floor on. we used hardies 19mm compressed cement sheeting. we measured, cut and fixed the boards on with screws. then we went back to our drawings and began drawing up some lines.

Thursday, January 24, 2008

FRIDAY

today we went out to finish the floor. we cut some more joists and nailed them in, measuring back every now and then to make sure the joists are in the correct spot. after we finished nailing in the joists we went and got the 18mm partical board to use as out flooring. i measured the boards which were 3.6x1.2 then i measured back from the wall to see where the join is going to be. it was about 20 mm off a joist so i decided to nail a joist right next to it to make sure the floor can screw to it. we then statred laying the floor down screwing the corners when they were flush and square. we staggered the boards so the joins were different. we measured each space exactly so that the board would fit nicely in its spot. after this we cleaned up, finished our brown paper drawings and came across to the computer rooms to research different types of deep joist products. good times

Wednesday, January 23, 2008

THURSDAY

today we were straight out into the heat measuring bearers and cutting them. me and greg were cutting the bearers while the other guys nailed them in. once all the bearers were cut, greg and i were nailing them in aswel. when it came to cutting the joists it was again greg and i who were cutting. however, the other guys seemed to be struggling a little with the nailing in of the joists. i went out the to see what was the problem and realised that we actually didnt know how much over hang there was meant to be. i stopped them and tried to explain and work out the situation. i put the string lines back in so that we could see when the joists are flush with the line. althou, the guys thought i was taking too much time and they wanted the job done as quick as possible so they ignored what i said and carried on nailing joists in. about hlaf an hour later paul came out and told them they were doing it wrong and that they should have been doing what i said. im not saying i know everyhting but that annoyed me that they didn't listen to me in the first place and we wasted so much time. so after all this, we finally got our must joists in. renna and mike went home sick so the three muskatees (greg, rob and i) continued on. we packed up and went on with drawing. we pretty much finished our drawings and began reserching different types of joist products.

AS1684....best thing since slice bread (paul said to mention it)

Tuesday, January 22, 2008

tuesday and wedneday.

today we began our setting out stage of our mini house. we went out into the spare blocks, located our area and began to measure where our string lines and pegs are to be put. we put in our hurdles, then levelled them to a certain datum taken by the automatic level. after it was all levelled up we started to work out where our perimeter roughly was going to be and hit in pegs on these points. we then began to mesure off our boundary marks to get a true line. once we have this true line we were able to work out our boundaries by measuring off our true line and checking the parellel lines we equal. once this was achieved we measured our diagonals and make any adjustments needed until both measurements were the same. so we, have got our square perimeter, we then had to measure from the back and worked out where the minor offset room is. once this was in we worked out where the stumps, bearers and joists are to be going. we then went out and dug the holes for the stumps, when the holes were dug we put in the stumps levelling them before securing them in. after this we measured our bearers, cut them and nailed them flush with the outside of the bearers. we then started marked out where the joists were going and began to cut them and nail them on.
it became wuite hot on wednesday afternoon so we retired the shovels and went inside to begin setting up our brown paper drawing. The drawing will show where the stumps go and how far into the ground they must be, and where the bearers and joists are allocated.

Sunday, January 20, 2008

monday 21st of january

this morning we continued on with our plan of the sub floor working out how to order timber for a job. we worked out our lengths of bearers, joists, stumps and sole plates and costed them all. we also added in labour costs, hardware, GST and profit to give us our final cost of the whole project. the task proved a bit difficult as we were all getting different answeres and had different ideas of what was to be done. after paul went through it with us and we all understood, we went back and changed a few things until we all roughly had the same costs. we then went out and got our drawing boards and began organising our brown paper drawings of how our bearers, joists, stumps and sole plates are going to be assembled.
friday 18th january.

today we sat our assessment for our carry all. it consisted of 23 questions all relevent to the planning and construction of our carry all. i think i did alright in the test. after this we carried on with our work booklets and discussed as a group about the sub floor and what is going to be involved, then began to draw up the plan on the white board.

Wednesday, January 16, 2008

thursday 17th of january.
today we worked through our work books. we got given a few booklets and started on the levelling and set out booklet. we continued on using practical carpentry book 1 and 2 as a resource to find answers. after smoko we looked at sub floors. paul showed discussed how to go about a constructing a sub floor with us. we then did a bunch of activities on sub floors, working out what bearers, joists, stumps and sole plates we will need. we worked out all the lengths of each and how many to order. we then worked out how much strip flooring we will need to cover a certain room and how we would order it. after this, we sat down and started working through the sub flooring booklet, answering question at our own speed.

Tuesday, January 15, 2008

wednesday 16th january

in the morning we starting discussing what we are to be doing for the day which is setting out the bounderies of the house. we got given plans and discussed how we are going to go about it. we then got all the tools and equipment needed for the job and set out to find a location. after we found a grassy area suited for our task we got our first foundation line of the boundary. we used the dumpy level to level all our hurdles, then begun to work out our measurements of the house. we had a couple of complications on measuerements and how to go about it. after a while it stared to come together and the we only needed to worry about getting it square. we double checked our parrellel and horizontal lines until it all matched up and was square. we then took it all apart and returned to the classroom to discuss what we have learnt. communication between the team proved vital as everyone needed to know what was going on for the task to work. we worked fairly well together, helping somone out if they were a bit lost. good lesson

Monday, January 14, 2008

tuesday 15th of january.

today we started out doing a levelling excercise with the dumpys. we went all the way around the perimeter of the tafe measuring the rise and fall of the land. it was pretty interesting. after smoko we recorded our results and drew up a graph with our information. our aim was to get back to the datum point and have the same height. we were 45 mm off. althou, thats not bad considering it was over 900 metres. we then went out with the dumpys measuring the distance between two points and checking if the dumpy was close. it turned out it was within a couple hundred mm. we then discussed what was planned for tomorrows lesson. you'll have to wait until then to find that out but...

Sunday, January 13, 2008

well its the first day back at tafe for the new year. what a glorious day... the sun is shing and we are stuck in a classroom.. yess!
today we were introduced to our course outline for the year and mainly for the next two week block. we started out by researching different types of levels and their uses, then each picked one to research more and give a presentation on them.
we then took some dumpy levels and an automatic level outside to carry out a levelling excercise. we used a stake to get the reference point then tranfered that point to another stake about 20 metres away. we then moved the levels to see if they lined up and that the level itself was accurate. after this we headed back to the classroom to discuss what we learnt and put it on paper to go into our portfolios. what a day:)